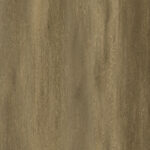
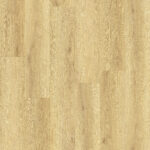
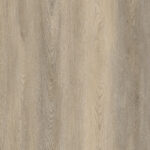
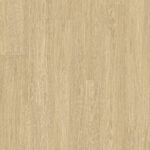
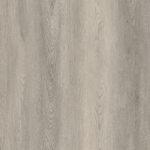
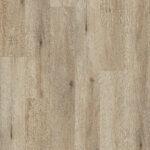
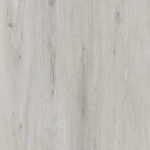
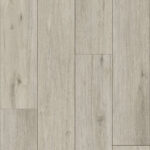
Simply and clever
Installation
glueless locking for both sides of the pane
Pristine Flooring
Installation Instruction
PLEASE READ ALL INSTALLATION INSTRUCTIONS CAREFULLY BEFORE YOU BEGIN INSTALLATION. IMPROPER INSTALLATION WILL VOID THE WARRANTY.
Always check PRISTINE Luxury Vinyl Plank and Tile panels for defects such as chips and color or sheen differences under well-lit conditions. Also, check that the click channel is clean and free of debris. Always work out of multiple boxes to mix products to achieve proper pattern repeat and color appearance. Color variations between flooring, samples, and replacement material are expected and are not a product defect NOTE: PRISTINE LVP can be installed above, on, and below grade. The product may be installed either as a floating floor or by direct glue-down method on approved wood or concrete subfloors. Direct glue-down applications require a full-spread adhesive manufactured exclusively for LVP. Never use an adhesive that is recommended for multiple products. Follow the manufacturer’s installation instructions when fully spreading our PRISTINE LVP.
PRISTINE “cut-back” adhesives can stain PRISTINE flooring. These must be 100% removed, encapsulated or covered with plywood underlayment. Some previously manufactured cutback adhesives contained asbestos fibers, which are not readily identifiable. Do not use power removal devices, which can create dust. The use of solvent-based adhesive removers is never recommended. NOTE: If d-limonene (citrus-based) cleaners/removers are used (Orange All), sub floor must be thoroughly rinsed. If complete removal of old adhesives or covering them with plywood is not possible, the use of a Portland Based Leveling or Patching Compound is acceptable. Please follow manufacturer’s instructions carefully.
- Safety Glasses
- Broom/Vacuum
- Tapping block
- 1/4 spacers
- Pull bar
- Saw
- Utility Knife
- Pencil
- Tape Measure
- Ruler
Do not install over:
- Existing resilient tile floors that are below grade
- Existing cushion-backed vinyl flooring
- Carpet
- Hardwood flooring that has been installed directly over concrete
- VCT flooring that has been installed directly over concrete
- In rooms with sloping floors or floor drains
This Locking system is designed to be installed utilizing the floating method. Always use the proper expansion space. Undercut all doorjambs. Never fasten moldings and or transition strips to the planks.
The use of a recommended underlayment is recommended under the PRISTINE LVT floor in installations where sound abatement is needed. Run the foam underlay in the same direction as the PRISTINE LVT panels. Underlayment should be butted side by side with no overiap. Tape the butted seams together
- It is important to determine your floor layout at the start of the installation. This will prevent narrow plank widths or short length planks in the installed floor.
- Planks should be installed parallel to the longest exterior wall.
- Determine the width of your starter plank in your first row. If it does not need to be cut, create a clean plank edge for the wall by trimming the unsupported tongue from the plank with a utility knife.
- Start the room installation from the left side and work to the right facing your starting wall. Maintain a W expansion zone from the plank to the
- The second plank in the first row is installed by angling the tongue of the end joint into the end groove of the first plank. Do not bend the plank or the comer. Remember to leave a expansion space from the wall. Start the second row by cutting a plank at least 6″ in, length (the minimum length of a starter or ending plank). This recommendation is for appearance as well as structure.
- To start the second row, fit the first plank in the second row by angling the plank and engaging the tongue of the long side into the grove of the plank in row one. Install the second plank in the second row by engaging the short end tongue into the previously installed plank groove. Align the plank so that the long side tongue is placed slightly over the groove of the plank in the first row. Lifting at a low angle, insert the long tongue into the groove of the plank in the first row. Very little force is required to engage the tongue into the groove. You should feel the tongue lock into place in the groove.
- Work to the right in the first row installing planks along the wall and next align the planks in the second row. Installing in this fashion will keep these two starting rows straight and true. The installation should be frequently checked for squareness and straightness of the rows and planks.
- Cut the last plank in the first row and leave an expansion gap of 14″. You may cut planks with a utility knife using a score and snap method or an LVP cutter. If the remainder of this plank is a minimum 6″ long, it can be used to start the third row.
- Install remaining planks making sure to achieve a random appearance of end joints. Starting and ending planks must be a minimum of 6″ in length. If any gapping is found, tap the space together using a tapping block and a scrap piece of the installed flooring to protect the plank from the tapping block until the joint is closed.
- When fitting under door casings, a pull bar may be used to assist in locking the planks. You can also remove a portion of the locking mechanism and glue the plank using super glue to connect the plank.
- When fitting planks into irregular spaces or near obstructions, a pattern using felt or butcher paper can be made to transfer the pattern to the plank. The plank can then be cleanly cut using a utility knife.
- Install moldings, baseboards or transition strips to any exposed edge of the flooring. Since this is a floating floor, make sure that the planks are not accidently attached to the subfloor when the molding is installed.Protect the newly installed floor from other trades by covering the finished flooring with an appropriate paper.
PRISTINE LVT Floors Exclusive Limited Warranty
Pristine Flooring Solutions warrants that its PRISTINE planks and tiles are free from any visual or manufacturing defects. If the Products are found to be defective, Pristine Flooring Solutions will supply new Product of the same or similar style, size, color, grade, and gauge to repair or replace the defective area and will pay reasonable labor costs provided the flooring is professionally installed and maintained according to the installation instructions provided. Products that are non-defective but are damaged during an improper installation by not following the Pristine Flooring installation guidelines do not constitute a valid claim as defined by this limited warranty. This warranty will not include loss of time, inconvenience, incidental expenses (such as telephone calls, removal and replacement of items placed over the floor after the original installation, etc) included in the removal and reinstallation of the affected material, and any other incidental or consequential damages. Pristine Flooring Solutions reserves the right to inspect any claim and/or request photographs and/or samples associated with the specific claim prior to approving any claim. All limited warranties are valid for the original purchaser of the flooring only and are not transferrable.
Pristine Flooring Solutions warrants that its PRISTINE plank and tiles products are free from visual defects. All Product purchased for an installation should be inspected by you and/or your installer. Pieces that appear to be visually defective should not be installed. Pristine Flooring Solutions will not be responsible for reimbursing labor charges on any claim for visually defective product installed. It is the responsibility of the installer to determine the suitability of the product for installation before it is installed.
Wear Limited Warranty
Pristine Flooring Solutions PRISTINE LVT planks and tiles are protected with a wear layer. Pristine Flooring Solutions warrants that there will be no wear-through of the wear layer for the number of years indicated for the specific product. “Wear-through” means complete loss of the wear layer so that the printed color layer is changed or affected. The term for your specific product wear Limited Warranty will appear on the insert of the product you purchased. This Limited Warranty applies only to first quality merchandise provided the recommended installation and maintenance procedures are followed as outlined in the Installation Instructions and Owner’s manual.
Pet Warranty
Pristine Flooring Solutions PRISTINE planks and tiles are warranted to resist stains caused by pet soiling from domestic dogs and cats during the specific warranty time frame. The pet stains include urine, feces, and vomit Resisting stains means that your floor has the ability to minimize or hold out permanent stains under the conditions stated. Pet accidents should be cleaned up immediately, as the longer they sit, the more difficult they will be to remove. Any damage to the subfloor and/or surrounding structure caused by pet soiling is not covered by this warranty. Please follow our maintenance procedures for cleaning the affected areas. This warranty does not cover soiling and staining caused by any other pet type besides those stated above.
Waterproof Limited Warranty
Pristine Flooring Solutions PRISTINE LVT planks and tiles are warranted to be 100% waterproof. The structural performance of the planks or tiles, when properly installed and under normal use conditions, will be resistant to damage caused by exposure to water for the life of the product.
Waterproof Limited Warranty does not cover:
- Any damage to structures that are not part of the installed PRISTINE LVT flooring such as damage to surrounding walls, subfloor, structures, fixtures, furniture, underlayment, moldings, trims, and subfloor heating systems, or anything that is not the tile or plank.
- Any damage from mold and/or mildew growth due to extended water exposure.
- Flooring that is installed outdoors.
PRISTINE LVT Floors
Once the floor has been installed, vacuum or use a dust mop to clear the floor of any loose dirt or residual dust or debris. The floor can be wiped with neutral pH cleaners or water.
Furniture should have felt pads attached to the feet to avoid scratching the floor.
Heavy appliances or furniture should sit on non-staining large surface flooring protectors.
When furniture has castors or wheels on the feet, they must be suitable for resilient floors, large surface non-staining, and swivel easily. Do not use ball-type castors because they can damage the floor. Castor wheels should be equipped with wide, rubber castors Protective matts should be non-staining as rubber mats may discolor the floor.
All furniture pieces should have floor protectors under them.
Walk-off mats should be used in entrances to help prevent dirt from being carried onto the floor.
Regularly sweep or vacuum the floor to remove dirt and dust. Do not use a vacuum with a beater bar to vacuum the floor as this can cause floor scratches.
Do not use hard bottomed electric brooms without padding as they can scratch the floor.
Pristine Flooring Solutions does not recommend the use of any type of steam cleaner on our floors. The concern with these types of cleaners is that they generate too much moisture and heat. If adhesive was used the resulting moisture and heat can be enough to break down the adhesive. Also, in instances where no glue is used, we have seen both peaked and swelled edges occur. Therefore, all complaints that are determined to be from a consumer using a steamer will be denied by Pristine Flooring Solutions.
If pet urine contacts the floor, it should be cleaned in a timely manner. If the floor is not cleaned and the urine removed, it may dull the finish. Liquid spills and any wet areas should also be cleaned in a timely manner. The floor can be damp mopped with clean warm water and a dilute floor cleaner as needed. Do not use harsh cleaners or chemicals, abrasive scrubbing pads, abrasive tools, or abrasive cleaners as they can scratch the floor. Do not use detergents and do not use floor shining products like “mop and shine” types on the floor.
Petroleum-based products can stain the surface of your vinyl floor. These include materials like asphalt driveway sealer and engine motor oil, among others.


